This is a sponsored post written by me on behalf of The Home Depot.
If you've been following along with our Front Porch Makeover, you've read about our plan, shopped for supplies with us and now we are ready to get to work installing our new tiles.

We're working with an existing outdoor surface, but remember, you can also install envirotiles on level dirt or even in basement areas inside your home.

Make sure your area is free of all debris before getting started. (keep your broom and/or shop vac nearby - you'll need it to clean up after making cuts)
To see how the tiles are going to fit, lay a row down the width and length of your area. Then you'll know if any of them will need to be trimmed.
Our tiles were a little longer than the width, so we knew we were going to have to cut some off of the side that went against the house. That left the tiles along the outer edge looking nice and smooth.

We started in the corner and worked our way down each row and then over.
(If you're working with all straight edges, you can follow the instructions HERE, starting in the center of your area)
There were a few spots with cement clumps that we chiseled out of the way to make sure the tiles would be flush against the walls.

For trouble spots that require some trimming, you're going to want to measure how much needs to be trimmed...

And mark your measurements on the tile using a marker (or chalk). Our wall wasn't completely straight, so we had to take two measurements, one at both ends.

Connect the two measurements with the straight edge...

And using a utility knife, score successive lines while bending the tile up to get the scoring line deeper. We ended up using a hack saw to speed up the process.

Place your tile in the space to see if it needs anymore trimming.

Once you have a perfect fit, put your clips into place. (Since our tiles were going on flat concrete, we used the connector clips instead of the adhesive.)
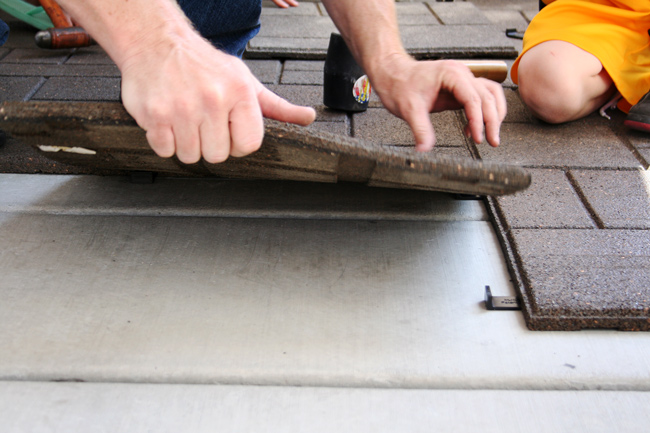
Lay your tile down on top of the connector clips...

and using your rubber mallet, hammer the tile down flat. (Make sure everyone in the family is there to watch you, even the dog.)
Once the job was finished, I sprayed the area off really good to remove all the dirt from the tiles (Since they had been sitting outside, they were pretty dirty)
And now I'm ready to accessorize!!
(We're almost ready to show you our new space.)

It’s home improvement time, and The Home Depot has everything you need to #DigIn for Spring. No matter what projects you want to tackle, they have great values on all you need. They’re ready to help you with renovation ideas and expert advice, too. Get over $300 in email exclusive savings each year, sneak peeks on new products, monthly lawn & garden ideas for your region and access to The Home Depot’s gardening experts. Click here to join the world’s largest garden community today! Or go to http://gardenclub.homedepot.com/ to see some of the many benefits of membership.
This is a sponsored post written by me on behalf of The Home Depot.


No comments:
Post a Comment