i think it's safe to say that you enjoyed giveaway day!
it makes us very happy to know that you share the same LOVE that we do for those awesome products!
well
let's keep the celebration going with today's project...
there isn't an occasion that flies by without hanging one.
you have to....they are just too cute!!
So, in case you don't already know how to whip one up...
we are going to tell you!
you'll need...
cute fabrics - totaling about 1 yard
muslin - about 1 yard
silhouette's clean cut fabric interfacing - it took about 3/4 of the package
or
wonder under - about 1/2 yard
silhouette's clean cut fabric interfacing - it took about 3/4 of the package
or
wonder under - about 1/2 yard
iron
scissors
a template for your flags
(we cut a piece of thick cardstock into a 6.5 x 11.5 rectangle. folded it in half and cut the V shape out of the bottom)
(we cut a piece of thick cardstock into a 6.5 x 11.5 rectangle. folded it in half and cut the V shape out of the bottom)
a template for your letters
a sewing machine
double fold bias tape
first: use your template to cut out 9 flags with your cute fabric and 9 flags of the muslin.
second:: we used the silhouette and the new clean cut fabric interfacing to cut out our letters. can we say...awesome! we were able to iron on the interfacing to the fabric first, then let the silhouette do the rest.
(that machine cut the fabric so nicely....it was fantastic)
if you do not have a silhouette, no worries. you can easily print out your letters using a computer. using the reverse side of the letter trace it on to your wonder under (the letter should be backwards) or other interfacing. then iron that on to your fabric. then they easily can be cut with scissors. all you need to do now is peel off the paper and it's ready to iron.
third: with right sides together, sew your flags leaving the top open.
(you will close this up when you sew on the bias tape)
fourth: press your flags right side out.
fifth: pin your flags to the bias tape. we left about 21" on each side and about 1 1/2" in between flags.
sew on your flags.
sixth: iron on your "celebrate" letters (or whatever saying you choose).
and you're done!!
it really is that simple!
it really is that simple!
. . . . . . . . . . . . . . . . . .
and a little fyi...
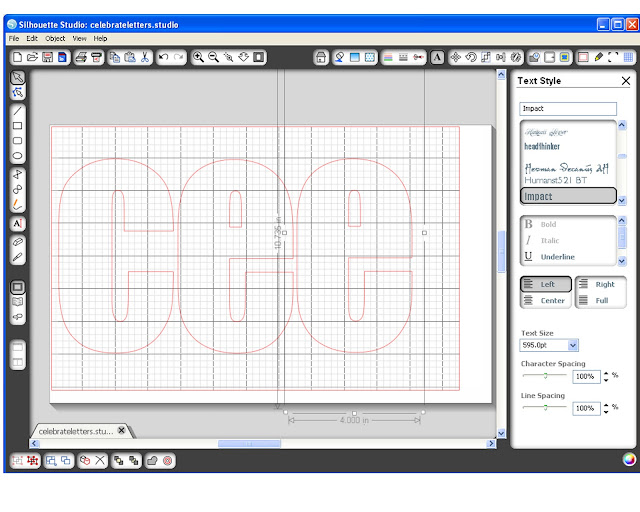
in the Silhouette Studio, we typed out all of the letters in the font Impact. When re-sizing the letters, make sure that the height of the actual letters are the same. (We did them at 6")
and a little fyi...
in the Silhouette Studio, we typed out all of the letters in the font Impact. When re-sizing the letters, make sure that the height of the actual letters are the same. (We did them at 6")


No comments:
Post a Comment